How To Take Screenshots on Mac
Fri, 24 Jul 2020 09:51:01
Staff ![]()
485
Screenshots can be very useful. You can use it to show your grandparents how to use the new application. You can use it to send injections of strange error messages to your company's IT department. You can use it to capture tweets before disappearing at the black hole deletion. So, if you need to take one or two screenshots, here's a quick and simple guide to taking screenshots on your Mac.
Read More: New Mac Ransomware Spreads Through Pirated Software
The latest versions (Mojave and Catalina) from macOS come with an application that saves your screenshot as a PNG file. Press Shift-Command (⌘) -5 to get the command bar at the bottom of the screen.
- The first three buttons from the left let you take a screenshot of the entire screen, a specific window, or an outlined selection of the screen
- The next two buttons let you start a video capture of all or part of your screen
- The “Options” button lets you choose where you want to save your screenshot, set a 5- or 10-second delay, and show or hide your cursor
- When you’re ready, click on the “Capture” button on the right end of the command bar
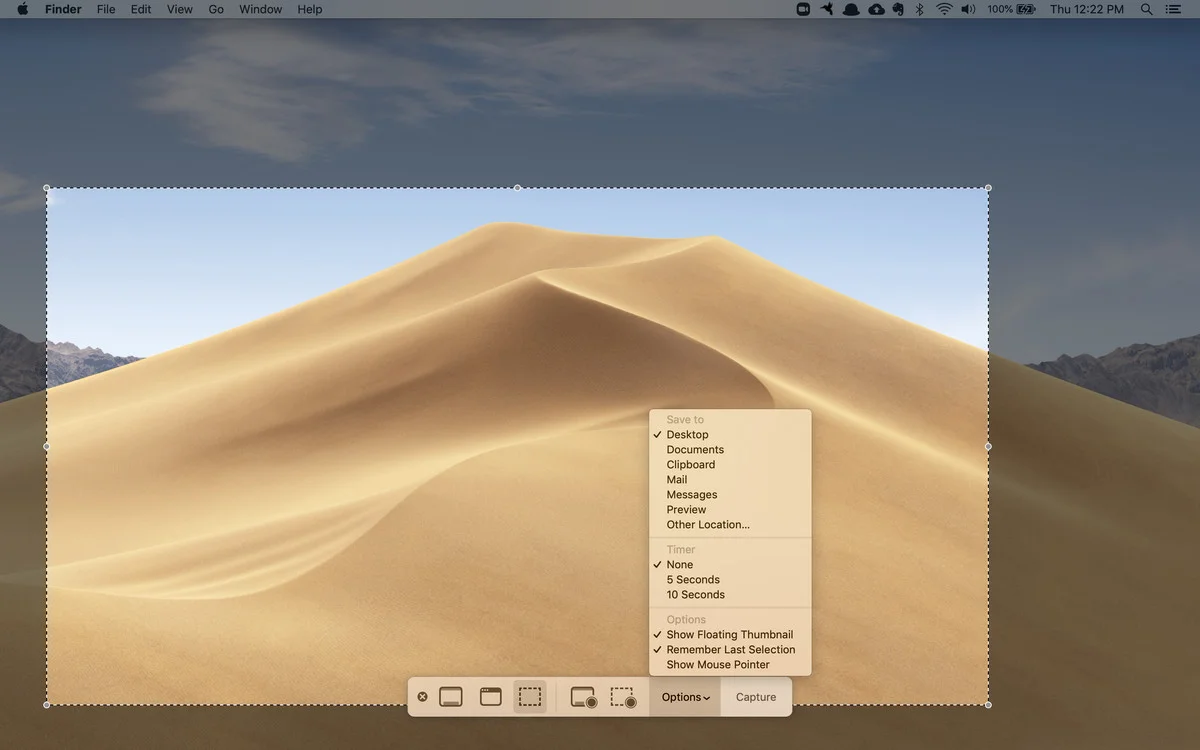
Press Shift-Command (⌘)-5 to get a command bar at the bottom of the screen.
Read More: How To Use Phone as Webcam on Windows or macOS
If you are in a hurry and don't want to deal with the command bar - or if you haven't upgraded to Mojave or Catalina - you can still save the screenshot to your desktop.
- To take a screenshot of the entire screen, press Shift-Command-3
- To take a screenshot of part of the screen, press Shift-Command-4 and then drag the cursor to outline the area you want to capture
- If you want to capture a specific window, press Shift-Command-4. Hit the spacebar. The cursor will turn into a camera. Hover the cursor over the window you want to capture until it highlights, and then click on it.
Keywords: take mac screenshot, mac screenshot shortcut, mac screenshot, macbook screenshot
Also Read:
Prev Post:
Next Post: