How To Use The New GPU Scheduling Feature In Windows 10?
Tue, 22 Sep 2020 08:49:44
Staff ![]()
342
If you are running the new Windows 10 2004 feature update on your machine, you may have come across a new feature called hardware-accelerated GPU scheduling.
The name of the feature is enough to make any Windows enthusiast curious. You might want to ask questions like, what is GPU scheduling in the first place? Well, this single option does a lot of work under the hood and helps the GPU manage its tasks assigned and resources appropriately.
What is Windows 10 GPU Scheduling?
Microsoft first added GPU scheduling to Windows OS 14 years ago with the release of the Windows Display Driver Model (WDDM). As a result of this change, the CPUs have a bigger say over GPUs when it comes to what happens inside your computer. For reference, before WDDM, apps would simply assign tasks directly to the GPU.
In the current setup, a high-priority thread runs on the CPU that “coordinates, prioritizes, and schedules the work submitted by different applications,” Microsoft explains. Hence, the existing Windows GPU scheduler needs the CPU and GPU to work in sync.
The process has become much more advanced over time, and the harmony between the CPU and GPU is maintained by creating a buffer. This is to compensate for the scheduling overhead created when shifting tasks between the CPU and GPU.
However, Microsoft acknowledges there is a fundamental drawback in the way the GPU scheduler works. For example, the buffer is responsible for increasing the latency or creating input lag.
That’s why, with the addition of the new hardware-based GPU scheduler in WDDM 2.7, Microsoft has put the job directly in the hands of the GPU. Now, a dedicated GPU-based scheduling processor handles high-frequency tasks while Windows still takes care of which application gets priority.
How To Enable Windows 10 GPU Scheduler?
Enabling the new hardware-based GPU scheduler in Windows 10 May 2020 Update is nothing more than clicking on a toggle button. You can follow the steps mentioned below:
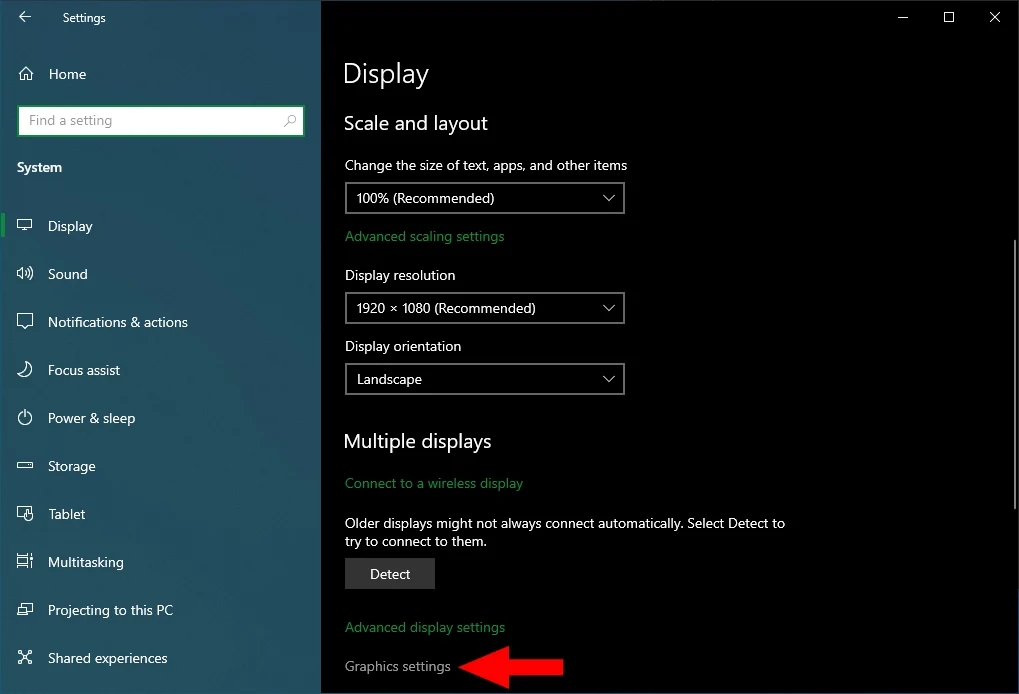
- Go to Settings > System > Devices > Display.
- Here, scroll down and click on the Graphics Settings option.
- Next, click on the toggle button that says Hardware-based GPU scheduling.
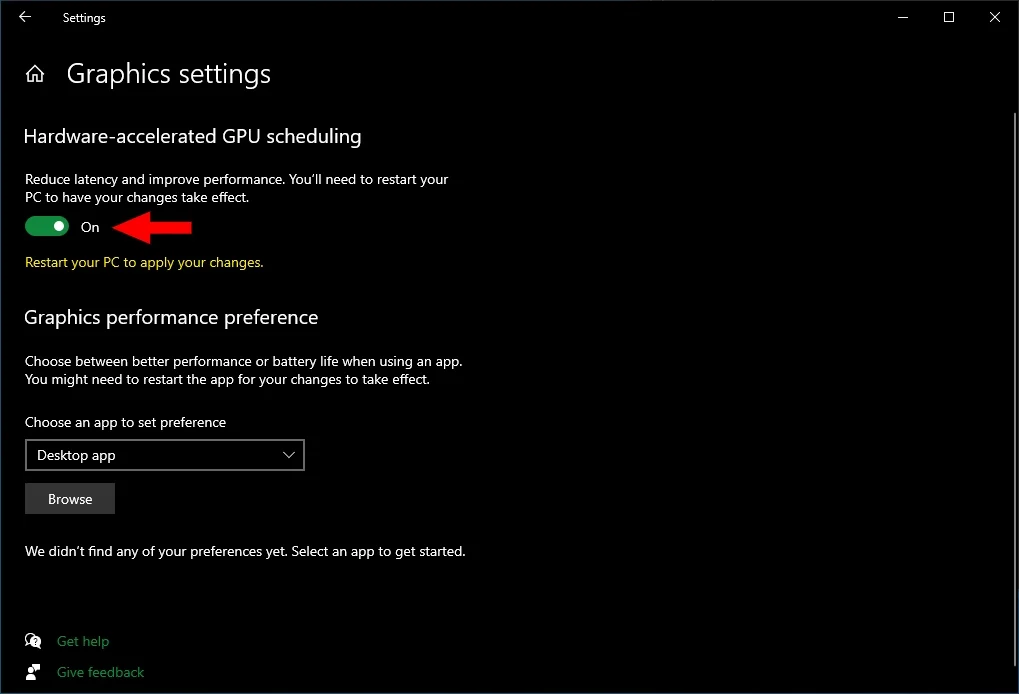
- Restart your PC.
Again, as mentioned above, here, Microsoft has written that the feature reduces latency and improves the performance of the device. However, you won’t see changes happening in real-time in the foreground after the feature is enabled.
Microsoft also analyses telemetry data from devices using old and new GPU scheduler to know the performance differences and issues. For example, it looks for signs of system freeze, BSOD, GPU hangs, etc.
The new GPU scheduler is currently in the development stage, hence, it’s turned OFF by default in the May 2020 Update.
Also Read:
- Nvidia Announced Ray Tracing For Fortnite, COD Cold War, Cyberpunk 2077
- New Nvidia RTX 3080 GPU: Price, Release Date, and More
Download the latest Nvidia and AMD Drivers
Now, simply enabling the feature won’t allow you to take its full advantage. You need to upgrade your GPU drivers to the latest version that supports the new GPU scheduling feature.
If you are running an Nvidia graphics card, then you should install Game Ready driver version 451.48 (or later).
That’s all you need to know about the new GPU scheduler. If you have something to add, drop your thoughts in the comments.
Keywords: how to install new gpu, new gpu scheduling, new gpu nvidia
Also Read: